Scale models are mini versions of life sized vehicle’s such as cars, trucks, aircraft, boats and tanks. Military vehicles are also popular when it comes to scale models and they were especially after world war II. This was the golden era not just for civilian but also army vehicle kits. With the introduction of plastic, model kit manufacturing started to increase in popularity. Today there are various kinds of tank kits from different manufacturers and in different sizes that can be assembled even by a novice. While there are many steps when it comes to assembling model tanks, making it look as realistic as possible is considered to be the hardest thing.
Painting Tank Models
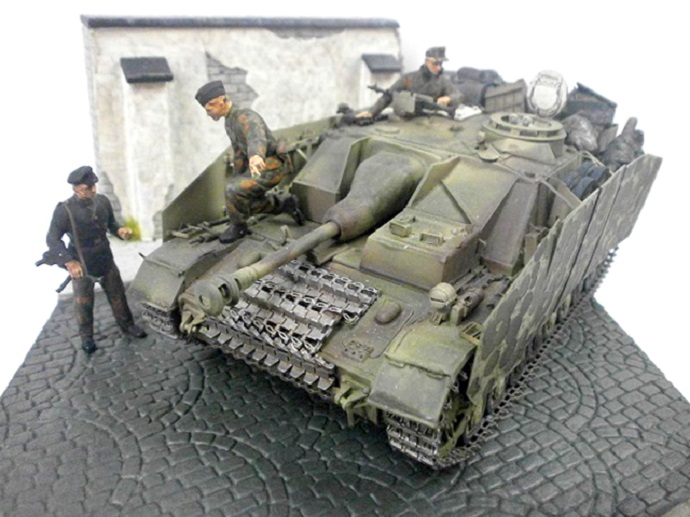
 Painting scale models is done in order to bring them to life. Whilst some kits their parts already painted, other kits don’t which is why these plastic army tanks need to have their camouflage and paint added. This is also the part you get to have most fun with and see how your model becomes true to life.
Weathering Tank Models
Another part of making model tanks more realistic is with weathering. This is a process that isn’t mandatory but it makes the model match its surroundings. For example, if the environment is sandy then the model needs to be covered in sand or if there is mud around, the model needs to have some on it. Weathering gives a more authentic look to your model but it is optional as some models look good with just a coat of paint and some camouflage.
How to Paint Tank Models?
 Painting plastic army tanks requires wearing a mask to prevent inhaling fumes and it starts by applying primer. You want to apply the primer by spraying away from the part and then going over it with an even coat. Apply one small layer at a time in order to get an even finish across the whole surface. Let each layer dry so you don’t soak the part – this will trap gas under the paint surface and bubbles will start to appear.
Next is applying base colour. This colour should be darker than the one you want to paint your model with. Apply the base colour the same way you applied the primer, just make sure to cover every corner and dent as this coat is what makes the shadows on the model. When it comes to applying the colour of the model, make sure to leave out small areas in order to get let the shadows take effect. Again, let each layer dry until you proceed onto the next one.
How to Paint Camouflage on Model Tanks?
For the camouflage, you’ll need to mask the areas you don’t want to be painted and leave out those you want to add the camouflage in. Camouflage consists of lines and spots that you can also add in with a brush, which doesn’t require masking but it takes a lot longer. You can apply whatever type of camouflage you want on your model kit tank just make sure you have the necessary colours.
Be as random as you want just remember to remove the masking before the paint dries as otherwise you can end up damaging the camouflaged area. Apply the paint for the camouflage the same way you did with the primer, base colour and main colour of the model. If you are adding multiple colours make sure to mask the previously painted areas before you add the next coat of paint.
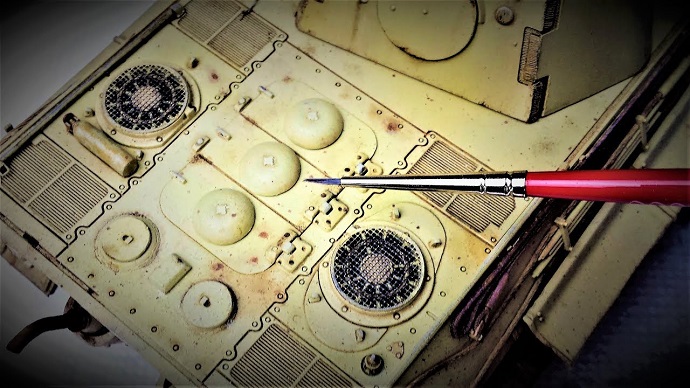
How to Paint Model Tank Tracks?
The same goes for the racks, after applying the primer and base coat its time to add a little bit of rust wash and dry dust. A rust wash is a thin coat of paint which you can either make it yourself or get one ready-made. They usually have 95 % thinner and 5 % paint. Rust wash can be spread with a brush all over the tracks or on the edges and between individual tracks. Once you’ve applied the paint with a medium brush leave it to dry.
Applying a layer of dried dust is done with a pigment powder and turps. Again using a medium brush which you first need to dip in turps and then in the pigment powder, dab it onto the tracks so it gets into every nook an cranny. This can get messy so make sure to cover your workbench or table with pieces of newspaper. When you are done applying the pigment powder let it dry and then brush off the tracks with a stiff stipple brush.
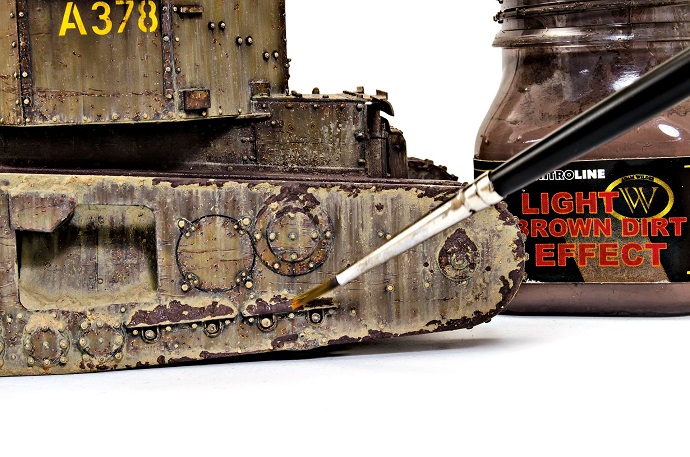
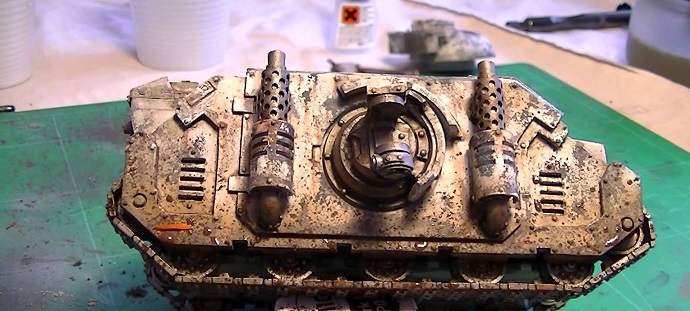
How to Weather Model Tanks?
You should weather your model with good reference material in hand. Does it need to have worn out areas, does it need to look more robust or have a more archaic look to it. The order in which you apply the weathering is important too. After you’ve applied the primer, base and main colour you’ll need to apply exposure and wear effects and then highlight metallic areas with the most wear. If weathering is not applied in the correct order you won’t achieve the effect you want.
Army models need to have washes of white, pale yellow and burnt umber applied to get that dirty and discoloured finish. Make sure to clean the model with turpentine but only after the base colour has been drying for 2 – 3 days. Let the turpentine run down the model and with a little bit of colour on your brush give it a bit of a touch on the top to form streaks down the sides. At the end of the day it’s up to you what kind of weathering effect you’ll add and whether or not you will darken, mix or lighten the colours on your model.